Summer 2020
This project was on a beautiful property on the Lake Superior shoreline just north of Thunder Bay. The exterior finishing would consist of the main house, two sheds, a gazebo and a sauna with vinyl siding, soffits, facia, and steel roofing installed.
The house received various renovations and additions over the years, many of which had not been completed by professionals. Portions seemed cobbled together, and we would have to make the entire structure seamless. The job would take some artistry in addition to skill. For this project, we used Board and Batten vinyl siding and 3 Panel Traditional soffits from Royal Building Products.
FIXING THE DOUBLE ROOFLINE
The first issue to tackle was a double roofline on one gable. It looked odd; even the facia boards were different sizes between the house’s front and back. We cut off the lower roof and removed all the facia boards. We would install new boards that were thicker to make everything more sturdy. They would also be wider, helping tie everything together and making the roof look “beefier.”


CUTTING DOWN THE FRONT OVERHANG
A large overhang at the front of the house blocked sunlight in the porch area. The clients wanted it shortened, which would fix the light issue. The change would also make the overall look more cohesive, matching the rest of the house.


REBUILDING THE WORKSHOP ROOF
Next up was the workshop roof. This addition started as a shed that was moved over and connected to the house. The walls were okay, but the roof collapsed due to undersized rafters. Many were also spliced together and oddly spaced. Adding properly sized rafters spaced correctly fixed the issue.
We took the opportunity to correct the overhangs so they were the same as the rest of the house, helping fix the cobbled look. After sheathing and strapping, we installed the steel roof.


THE MAIN HOUSE’S ROOF
The roof of the main house was the largest issue. The largest section in the front had two different slopes. When we ran a string line down the edge, it was over 2 inches high in the middle. It was also quite wavy from side to side. It required a week’s worth of shimming the strapping to get things flat.
After replacing the fascia boards, it started to look polished. We opted for a “rake” edge corner on the roof gables as they really enhance the look of a steel roof. After adding the soffits and fascia, the rooflines finally looked “tied together.”


Levelling the Workshop Walls
The workshop roof was not its only issue; the original owner built the exterior walls with an upward slope. That was fine when taken alone but looked odd with the rest of the house. We shimmed the siding to get it straight and reframed the doorway. After the vinyl siding and door capping, that section blended seamlessly with the rest of the home.
The main beam on one side of the foundation had also rotted away. We jacked up that end and installed a new beam.


CAPPING THE WINDOWS AND DOORS
Window and door capping often makes all the difference to an exterior finishing job. Butting the siding right up to the window or door lacks definition and looks amateurish by modern standards. Adding casing boards and capping can make your project really “pop.”


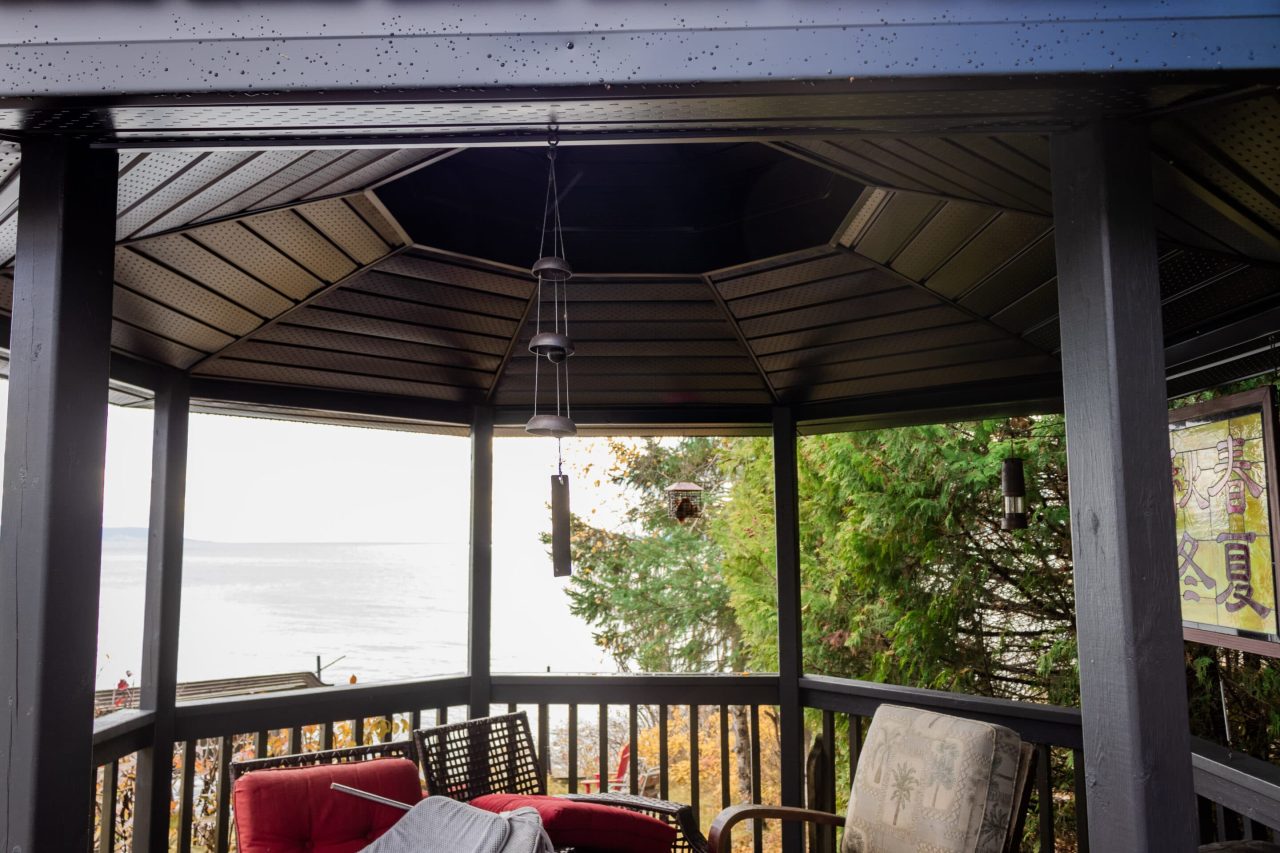
EXTERIOR FINISHING ON THE GAZEBO
The client wanted a gazebo on the property spruced up. Originally, it would just have a steel roof installed to match the other items on the property. We suggested adding soffits and fascia to finish it off and have the look of a modern metal gazebo but have a much longer lifespan. The results were amazing, and the outdoor space created is very inviting.


FINISHING THE SAUNA
The sauna was in rough shape externally. The wooden frames on the windows were rotten, and the glass practically fell out when we removed them. One was covered over, and the other was replaced with a unit we removed from the main house.
We added the steel roof and siding as we did with the other locations. The door was sticking, so we removed it and planed it down. Although faded, it was still pretty solid, so we proposed using a faux antique finish. It turned out amazing, although our pictures don’t do it justice.
Vinyl isn’t a good choice next to the wood storage, so we took some leftover metal from the flashing and used it where the siding might get damaged.


THE SHEDS
Two sheds on the property needed some work to blend in. The first was new but never finished on the exterior. We added the usual siding and capped the doors in black sheet metal. The owner had issues with bears getting into the garbage, so we made two “bear resistant” trash storage bins and attached them to the shed. In the front, we added a box for tire storage. We will put the house number on the shed in the spring, and it will really stand out from the road.
The toolshed has some interesting features. The sheathing on the bottom was rotting due to trapped water from compost left next to it. We covered the lower portion in black sheet metal and added crushed stone for drainage. The door was capped, new hinges added, and a better door handle installed so the people could no longer accidentally lock themselves inside. 🙂


FINAL THOUGHTS
We really enjoyed working on this project, and the owners were wonderful. They mentioned some other interesting projects they wanted to tackle in the future, so we may be back there soon.
